Genome Editor
You can get the Genome Editor for free at Chris
Double's site.
Don't forget to download and install the Dylan
Runtime Library!
First steps
First of all, you have to install
the genome editor. Click on the file frund3.exe
you have to download too! This is the runtime library.
The setup dialog will pop up and the needed files
will get installed on your computer automatically.
Then unzip the file "genome editor.zip"
and put the files in a new folder.
Now double click on the genome editor.exe
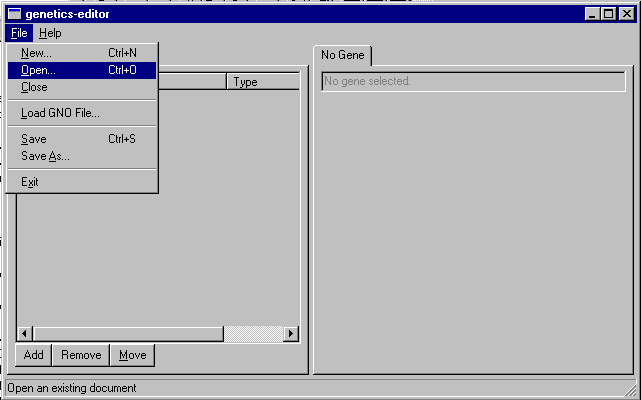
file. The Genome Editor opens up. It will look like
this:

In the picure you can see easily that
the dropdown menu under "File" got opened
already. Click on "open" in order to open
a .gen file. A box will pop up and you can browse
through the folders to find the .gen file you wanted
to alter with the Genome Editor.
.gen files can be found in :
- in the directory"Creatures
3" or "Docking Station", in the folder
"Genetics". Here you can find all the
genomes the egg laying machine uses to produce eggs.
Those are the "original" ones, like templates.
-in the directory "Creatures
3" or "Docking Station", in the folder
"My Worlds"\nameoftheworld, in a subfolder
called "Genetics". Here you'll find all
.gen files of the creatures which are currently
present in that world. Look also in the subfolder
"Attic" and "Porch" there you'll
find .gen files of norns which have died! If you
know the moniker of a creature (the long name with
numbers and letters) you can find the correspondent
.gen file of that creature!
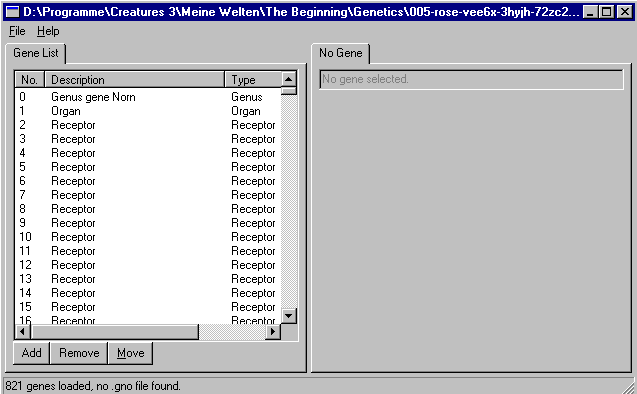
Doubleclick on the .gen file and it
will get loaded into the Genome Editor:

Looks like this!
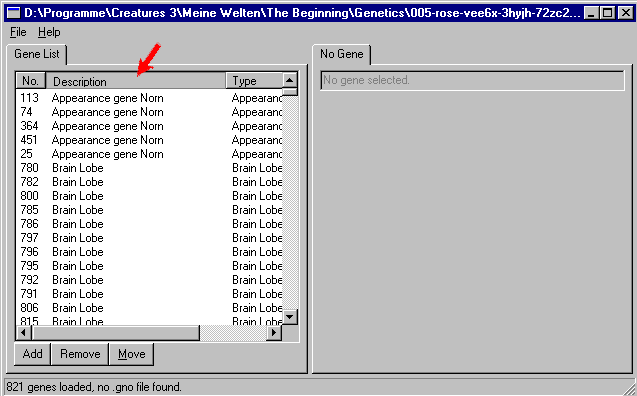
First, click on "Description"
(see red arrow in the picture below) in oder to
sort the genes alphabetically and also by their
function.

Okay, the genes with names beginning
with an "a" are on top! The first ones
are the "Appearance" genes..
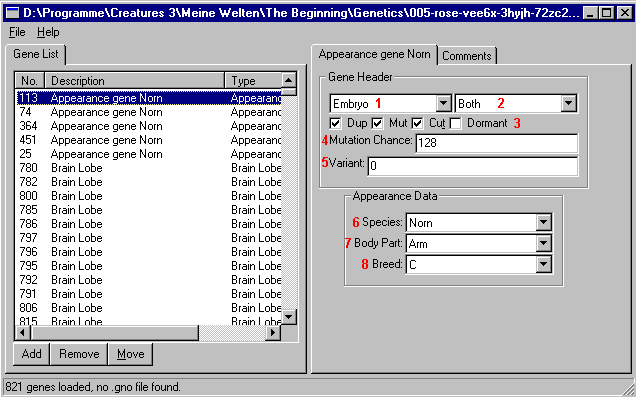
Click on the first gene . The right
window side now shows a dialog, That's how the settings
of a gene look like!

For a more detailed description I
put some red numbers in that picture. They mean:
1 Age, when this gene gets switched
on (Embryo = Baby, means, from the moment of hatching)
2 Sex for which this gene gets switched
on. (both = male and female likewise)
3 Dup = Duplicate, i.e. this gene
can get dulicated during conception; Mut = Mutation,
d.h. this gene can mutate during conception; Cut
= cut, d.h. this gen can be lost during conception,
dormant = if ticked, it means: this gene is present
but will not be expressed in the creature.
4 A value between 0 and 255 will determine
how high the possibilty of mutation for this gene
will be during conception. 0 = no mutation, 255
= highest possible chance of mutation.
5 This value is normally set to 0.
It's kind of a "place holder", maybe CL
will develop new Variants of this gene. So what?
Well, just remember this: If it isn't set to 0,
it will be present, but not expressed in the creature.
Same effect as "dormant" in fact.
6 Species: Chooses the sprites sest
of the species Norn, Ettin, Grendel or Geat.
7 Body part: in the picture: Arms.
There are five different appearance genes each for
head, body, arms, legs, tail.
8 Slot. Determines which sprite sets
of which slot will be taken. In the picture it's
C, means Civet sprites.
See
here for a tutorial about pigment genes!

